2、 7版本启动流程
2.1 启动流程图
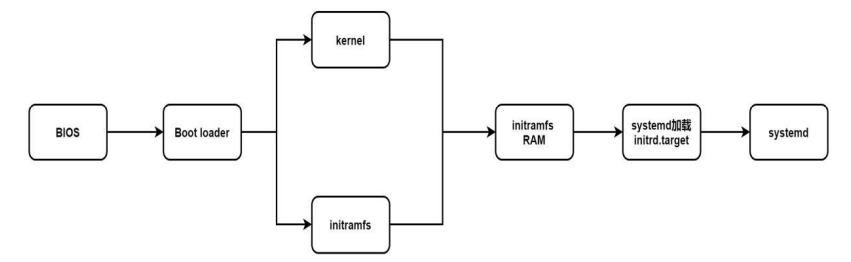
启动过程中名词解释
BIOS:加电自检,第一次硬件检测

MBR:该磁盘最前面可安装的boot 	loader区块
			boot	loader:启动引导程序,来解决内核文件,加载文件
							存在于启动设备的第一个扇区之中

加载内核检测硬件与initramfs
				内核通常在boot分区中,为/boot/vmlinuz*

将内核解压到内存,利用内核检测设备:CPU、内存、硬盘、网卡等
				第二次硬盘检测

非必要内核功能变成模块,内核不能读取,如SATA等
				虚拟文件系统,模拟成为一个根目录,在内存中提供程序,加载启动中所需要的内核模块

重新调用systemd,开始后续正常启动
2.2 管理服务状态
[root@localhost ~]# systemctl list-unit-files			#显示状态
UNIT FILE                                     STATE
proc-sys-fs-binfmt_misc.automount             static
dev-hugepages.mount                           static
dev-mqueue.mount                              static
proc-sys-fs-binfmt_misc.mount                 static
sys-fs-fuse-connections.mount                 static
sys-kernel-config.mount                       static
sys-kernel-debug.mount                        static
tmp.mount                                     disabled
• loaded:Unit 配置文件已处理
• active(running):一次或多次持续处理的运行
• active(exited):成功完成一次性的配置
• active(waiting):运行中,等待一个事件
• inactive:不运行
• enabled:开机启动
• disabled:开机不启动
• static:开机不启动,但可被另一个启用的服务激活
2.3 运行级别
[root@localhost ~]# ll /usr/lib/systemd/system/*.target|grep runleve			#查看系统运行级别
lrwxrwxrwx. 1 root root  15 8月  23 00:55 /usr/lib/systemd/system/runlevel0.target -> poweroff.target
lrwxrwxrwx. 1 root root  13 8月  23 00:55 /usr/lib/systemd/system/runlevel1.target -> rescue.target
lrwxrwxrwx. 1 root root  17 8月  23 00:55 /usr/lib/systemd/system/runlevel2.target -> multi-user.target
lrwxrwxrwx. 1 root root  17 8月  23 00:55 /usr/lib/systemd/system/runlevel3.target -> multi-user.target
lrwxrwxrwx. 1 root root  17 8月  23 00:55 /usr/lib/systemd/system/runlevel4.target -> multi-user.target
lrwxrwxrwx. 1 root root  16 8月  23 00:55 /usr/lib/systemd/system/runlevel5.target -> graphical.target
lrwxrwxrwx. 1 root root  13 8月  23 00:55 /usr/lib/systemd/system/runlevel6.target -> reboot.target
init	0	——》	systemctl 	pweroff								#关机

init	1	——》	systemclt	isolate	rescue.target				#单用户模式

init	3	——》	systemctl 	isolate	multi-user.target			#字符界面

init	5	——》	systemctl 	isolate	graphical.target			#图形化

init	6	——》	systemctl 	reboot								#重启
2.4 运行级别切换
[root@localhost ~]# systemctl set-default multi-user.target				#更改默认启动级别为纯字符	init3
Removed symlink /etc/systemd/system/default.target.
Created symlink from /etc/systemd/system/default.target to /usr/lib/systemd/system/multi-user.target.
[root@localhost ~]# systemctl get-default								#查看默认启动级别
multi-user.target
[root@localhost ~]# systemctl set-default graphical.target				#更改默认启动级别为图形化	init5
Removed symlink /etc/systemd/system/default.target.
Created symlink from /etc/systemd/system/default.target to /usr/lib/systemd/system/graphical.target.
[root@localhost ~]# systemctl get-default								#查看默认启动级别
graphical.target
2.5 grub2与grub区别
七版本
[root@localhost ~]# vim /etc/default/grub

GRUB_TIMEOUT=5											#默认等待时间
GRUB_DISTRIBUTOR="$(sed 's, release .*$,,g' /etc/system-release)"
GRUB_DEFAULT=0											#修改默认启动内核顺序
GRUB_DISABLE_SUBMENU=true
GRUB_TERMINAL_OUTPUT="console"
GRUB_CMDLINE_LINUX="rhgb quiet"
GRUB_DISABLE_RECOVERY="true"

[root@localhost ~]# grub2-mkconfig -o /boot/grub2/grub.cfg 		#启用
Generating grub configuration file ...
Found linux image: /boot/vmlinuz-3.10.0-957.el7.x86_64
Found initrd image: /boot/initramfs-3.10.0-957.el7.x86_64.img
Found linux image: /boot/vmlinuz-0-rescue-51b463e7803f477d9f46aa6163e1f85e
Found initrd image: /boot/initramfs-0-rescue-51b463e7803f477d9f46aa6163e1f85e.img
done
六版本
[root@localhost ~]# vim /boot/grub/grub.conf

# grub.conf generated by anaconda
#
# Note that you do not have to rerun grub after making changes to this file
# NOTICE:  You have a /boot partition.  This means that
#          all kernel and initrd paths are relative to /boot/, eg.
#          root (hd0,0)
#          kernel /vmlinuz-version ro root=/dev/sda3
#          initrd /initrd-[generic-]version.img
#boot=/dev/sda
default=0															#修改默认启动内核顺序
timeout=5															#默认等待时间	(秒)
splashimage=(hd0,0)/grub/splash.xpm.gz
hiddenmenu
title CentOS 6 (2.6.32-642.el6.x86_64)
        root (hd0,0)
        kernel /vmlinuz-2.6.32-642.el6.x86_64 ro root=UUID=b8391479-c2e4-4116-8166-c9da7736e758 rd_NO_LUKS  KEYBOARDTYPE=pc KEYTABLE=us rd_NO_MD crashkernel=auto LANG=zh_CN.UTF-8 rd_NO_LVM rd_NO_DM rhgb quiet
        initrd /initramfs-2.6.32-642.el6.x86_64.img
~
3 加密grub
七版本
设置grub密码,编辑配置文件,启用重启后,grub菜单按e进入编辑,ctrl+x启动
[root@localhost ~]# grub2-mkpasswd-pbkdf2 			#设置grub密码
输入口令:
Reenter password:
PBKDF2 hash of your password is grub.pbkdf2.sha512.10000.E605CEA1755860612BAE4B04A72DDDD913E0E6E268D434CAC1F14BED63C83F3D9FCDC7BF15B4E1CFF0DB9DB12AABB79833460032D2122477BC5B1C59F26090C3.C9DE311C026D3B3B8EF9D4549BE9AF8A238CCAC54A224DF854A7384A60F823601517D985C06CA11BE7D0CEE1AF42F5CBFA69DFB3DFCC61CD1651B871EB603AEF

[root@localhost ~]# vim /etc/grub.d/00_header 		#编辑配置文件
#在最后新加入
cat <<EOF
set superusers='yq'
password_pbkdf2 yq grub.pbkdf2.sha512.10000.E605CEA1755860612BAE4B04A72DDDD913E0E6E268D434CAC1F14BED63C83F3D9FCDC7BF15B4E1CFF0DB9DB12AABB79833460032D2122477BC5B1C59F26090C3.C9DE311C026D3B3B8EF9D4549BE9AF8A238CCAC54A224DF854A7384A60F823601517D985C06CA11BE7D0CEE1AF42F5CBFA69DFB3DFCC61CD1651B871EB603AEF
EOF

[root@localhost ~]# grub2-mkconfig -o /boot/grub2/grub.cfg 		#启用
Generating grub configuration file ...
Found linux image: /boot/vmlinuz-3.10.0-957.el7.x86_64
Found initrd image: /boot/initramfs-3.10.0-957.el7.x86_64.img
Found linux image: /boot/vmlinuz-0-rescue-51b463e7803f477d9f46aa6163e1f85e
Found initrd image: /boot/initramfs-0-rescue-51b463e7803f477d9f46aa6163e1f85e.img
done
删除grub密码:
 	将/etc/grub.d/00_header文件中的最后删除
 	grub2-mkconfig 	-o	/boot/grub2/grub.cfg		#启用配置
六版本
创建密码、修改配置文件、重启、grub菜单按p、输入密码进入编辑、b重启
[root@localhost ~]# grub-md5-crypt				#创建加密码
Password:
Retype password:
$1$VtlyA$ZA6Xwn.O0.oXPFQLTHS0F.
[root@localhost ~]# vim /boot/grub/grub.conf 		#修改配置文件

# grub.conf generated by anaconda
#
# Note that you do not have to rerun grub after making changes to this file
# NOTICE:  You have a /boot partition.  This means that
#          all kernel and initrd paths are relative to /boot/, eg.
#          root (hd0,0)
#          kernel /vmlinuz-version ro root=/dev/sda3
#          initrd /initrd-[generic-]version.img
#boot=/dev/sda
default=0
timeout=5
splashimage=(hd0,0)/grub/splash.xpm.gz
hiddenmenu
password --md5 $1$VtlyA$ZA6Xwn.O0.oXPFQLTHS0F.				#在title前加入password
title CentOS 6 (2.6.32-642.el6.x86_64)
        root (hd0,0)
        kernel /vmlinuz-2.6.32-642.el6.x86_64 ro root=UUID=b8391479-c2e4-4116-8166-c9da7736e758 rd_NO_LUKS  KEYBOARDTYPE=pc KEYTABLE=us rd_NO_MD crashkernel=auto LANG=zh_CN.UTF-8 rd_NO_LVM rd_NO_DM rhgb quiet
        initrd /initramfs-2.6.32-642.el6.x86_64.img
删除grub密码:
删除grub密码:
			进入/boot/grub/grub.cfg删除passwrod整行、重启即生效
4.1 通过liveCD修复grub
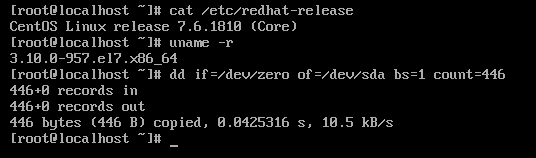
模拟损坏启动分区
$ dd if=/dev/zero of=/dev/sda bs=1 count=450 #六版本
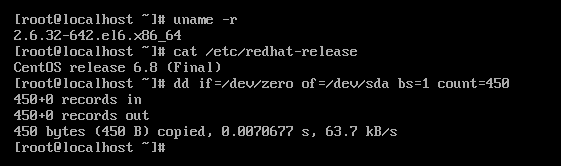
$ dd if=/dev/zero of=/dev/sda bs=1 count=446 #七版本
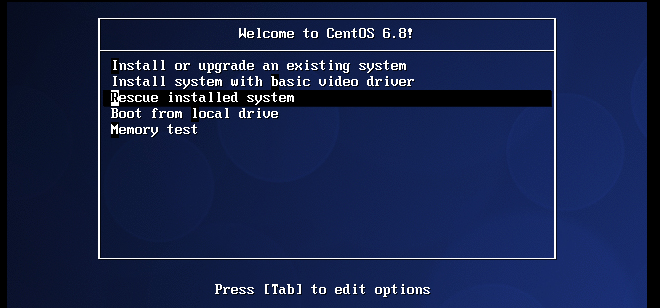
六版本修复grub
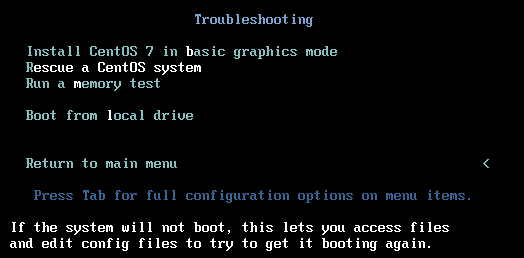
选择rescue
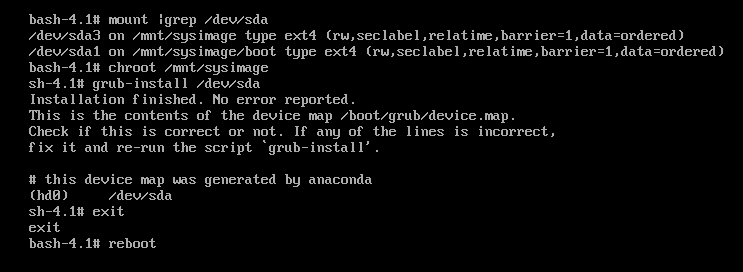
跳过
切换: chroot /mnt/sysimage
修复: grub-install /dev/sda
重启: exit----reboot
跳过,进入命令行
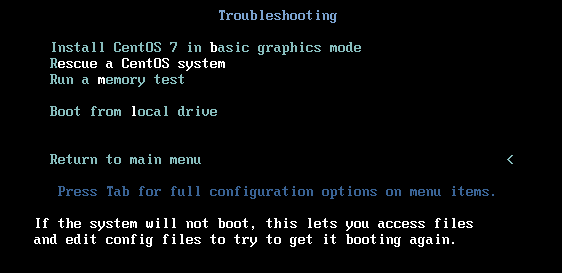
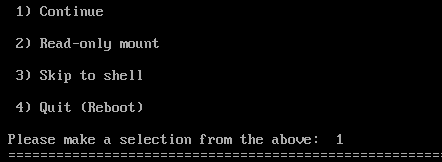
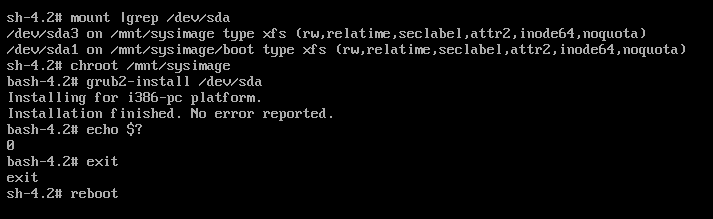
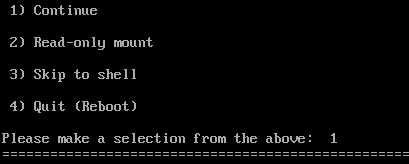
七版本修复grub
选择rescue
continue
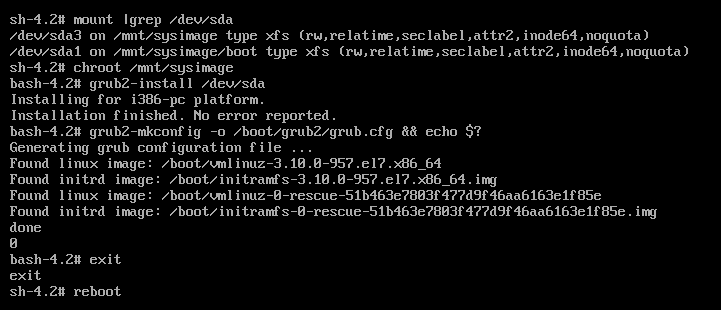
chroot /mnt/sysimage #切换
grub2-install /dev/sda #修复
exit----reboot #退出、重启
4.2 CentOS 7误删除grub
$ rm -rf /boot/grub2 #模拟删除grub
解决方法:
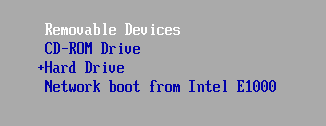
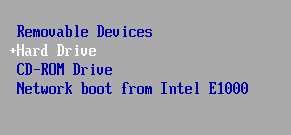
	修改启动顺序为光盘
	进入光盘修复
			rescue	-----》	chroot		/mnt/sysimage	-----》grub2-install	/dev/sda
	启用配置:grub2-mkconfig		-o		/boot/grub2/grub.cfg
	修改启动顺序为硬盘、重启
4.3 CentOS 7找回密码
## 1)	grub菜单中按e
		linux16行的最后添加:		rd.break
		ctrl+x	启动

## 2) mount -o remount.rw /sysroot #重新挂载/sysroot

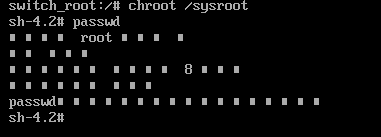
## 3)	切换:			chroot	/sysroot
		passwd修改密码
4)使配置生效
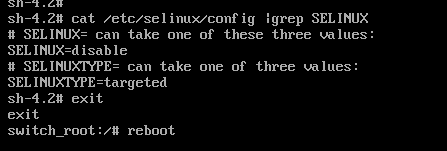
(由于在selinux关闭状态下修改密码,会导致在selinux开启状态下,无法识别修改的密码)
## 方法1:检查配置文件/etc/selinux/config中
			selinux=disabled
			exit	--->	reboot
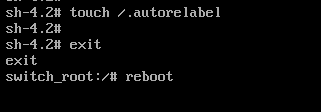
## 方法2:	touch	/.autorelabel			#重启时以SElinux默认类型,重新写入SElinux安全上下文
		  exit		--->	reboot